

ECDSA_SignVerify(SHA256) STM32F4 series
Preface
For the signature verification part, due to recent customer requirements, the MCU is bound and cannot be incorporated into SBSFU for updates. Additionally, the SBSFU update example currently only provides UART, and coding for other interfaces is required. After discussing with the customer, it was decided to use signature verification to ensure that the program has not been tampered with, opting not to use a regular CRC as it is more susceptible to hacking.
Reference Software Package
Here, for simple signature verification, you can directly refer to x-cube-cryptolib. Since F4 series is used in this context, it is advisable to refer to the older and similar L152 series, as G4 or L4 is a relatively newer series, potentially avoiding issues with missing functions.

The illustrated process is essentially as follows:

You can see that the main task for the MCU is to convert the data. In this case, SHA256 is selected, so the file is transformed into SHA256 format. After that, it goes through ECC verification. The generation of public/private key pairs is done through OpenSSL externally, not executed within the MCU.
SBSFU Overview
SBSFU includes the encrypted update part, and since the F4 series is relatively old, it supports fewer features, as shown in the reference diagram below.

Regarding the update steps, it will be as shown in the diagram. You can see that if you need encrypted updates, your code size cannot be too large. Additionally, your Flash size needs to be large enough (APP Code requires twice the size). This is a general overview, and since we are only using the signature verification part this time, I won’t go into detail here.

ECC Signature Verification Code
In the program, it will be divided into two parts: Boot code and APP code. The APP code part is relatively simple and will be packaged with the added header file through external software.
- The first part is the Boot code jump position (here, because the header file occupies 32KB, the position needs to be shifted back by Shift+200).

The main files that need modification here are:
- system_stm32f4xx.c
- ld file”
#if defined(USER_VECT_TAB_ADDRESS)
/*!< Uncomment the following line if you need to relocate your vector Table
     in Sram else user remap will be done in Flash. */
/* #define VECT_TAB_SRAM */
#if defined(VECT_TAB_SRAM)
#define VECT_TAB_BASE_ADDRESS   SRAM_BASE       /*!< Vector Table base address field.
                                                     This value must be a multiple of 0x200. */
#define VECT_TAB_OFFSET         0x00000000U     /*!< Vector Table base offset field.
                                                     This value must be a multiple of 0x200. */
#else
#define VECT_TAB_BASE_ADDRESS   FLASH_BASE      /*!< Vector Table base address field.
                                                     This value must be a multiple of 0x200. */
#define VECT_TAB_OFFSET         0x00008200U     /*!< Vector Table base offset field.
                                                     This value must be a multiple of 0x200. */
ENTRY(Reset_Handler)
/* Highest address of the user mode stack */
_estack = ORIGIN(RAM) + LENGTH(RAM); /* end of "RAM" Ram type memory */
_Min_Heap_Size = 0x200; /* required amount of heap */
_Min_Stack_Size = 0x400; /* required amount of stack */
/* Memories definition */
MEMORY
{
RAM (xrw) : ORIGIN = 0x20000000, LENGTH = 128K
/*
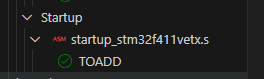
TOADD
Modify ORIGIN of FLASH to meet the requirement of your application
*/
FLASH (rx) : ORIGIN = 0x8008200, LENGTH = 512K-32K
}
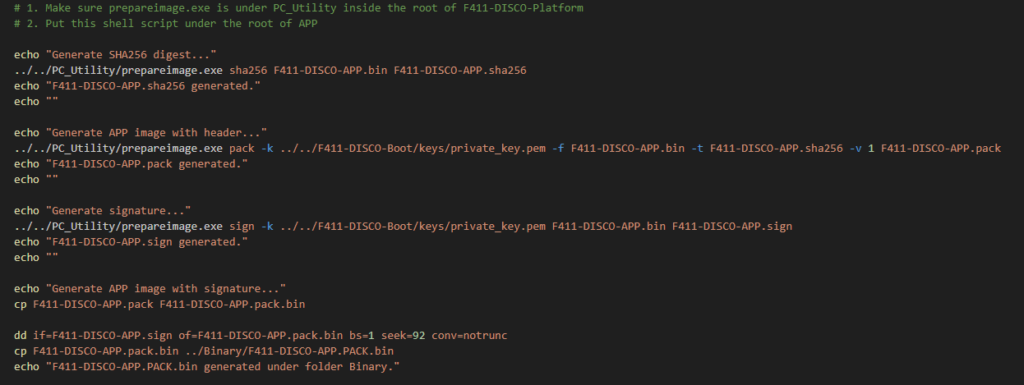
Here, external encryption and file packaging are done using Python, which is less related to the MCU. I will provide more detailed explanations in the future.
- The second part is the Boot code, which is the signature verification part. Here, you need to include the library and API layer of the encryption software package in your project.

Fill in the positions related to the header file that you planned for the APP, as the verification part will need to know the relevant data positions.

- Copy Middlewares from STM32CubeExpansion_Crypto_V4.1.0 and paste it under the root of BOOT
- In CubeIDE::Tool Settings::MCU GCC Compiler::Include paths (-I), add the follwoing:
../Middlewares/ST/STM32_Cryptographic/include - Copy cmox_low_level.c from
STM32CubeExpansion_Crypto_V4.1.0\Projects\NUCLEO-L152RE\Applications\ECC\ECDSA_SignVerify\Src\cmox_low_level.c
and paste it under BOOT\Core\Src - In cmox_low_level.c, modify included header from stm32l1xx_hal.h to stm32xxxx_hal.h of target STM32 family
- In CubeIDE::Tool Settings::MCU GCC Linker::Libraries:

- Libraries (-l):
:libSTM32Cryptographic_CM4.a - Library search path (-L):
../Middlewares/ST/STM32_Cryptographic/lib
In the executable file, you need to bring in the referenced Key. Add the following at the end of the executable file.
/*
  Add the following lines to include the binary of public key
*/
.section PUBLIC_KEY, "a"
.incbin "../keys/public_key.bin"
The key part also requires calling external software to generate (OpenSSL).

# 1. put this shell script under BOOT/keys
# 2. Run CD to come here and run this script for the first time to generate key pair
openssl ecparam -name secp256r1 -genkey -out private_key.pem
openssl ec -in private_key.pem -pubout -outform DER -out public_key.bin
Finally, in the main.c part, it’s relatively simple. The main task is to add the encryption signature verification part. In the first half, input the key BIN and signature BIN into the array.
mox_hash_retval_t hretval;
    cmox_ecc_retval_t retval;
    size_t computed_size;
    /* Fault check verification variable */
    uint32_t fault_check = CMOX_ECC_AUTH_FAIL;

    uint32_t app_img_size = *APP_IMG_SIZE_PTR;

    memcpy(myPublicKey, PUBLIC_KEY_PTR ,sizeof(myPublicKey));

    memcpy(mySignature, SIGNATURE_PTR , sizeof(mySignature));
