STM32CubeIDE Lib Generation and Application
Preface
Sometimes it’s necessary to share a compiled .lib file instead of the C source code when giving others access to your code. So, how can we use CubeIDE to compile a project into a .lib file and then utilize the .lib file? This tutorial will guide you through the process of creating a .lib file using CubeIDE and using it in your project (as there might be unexpected errors when referencing some libraries).
STM32CubeIDE How to create the Lib?
There are two ways to generate a .lib file.
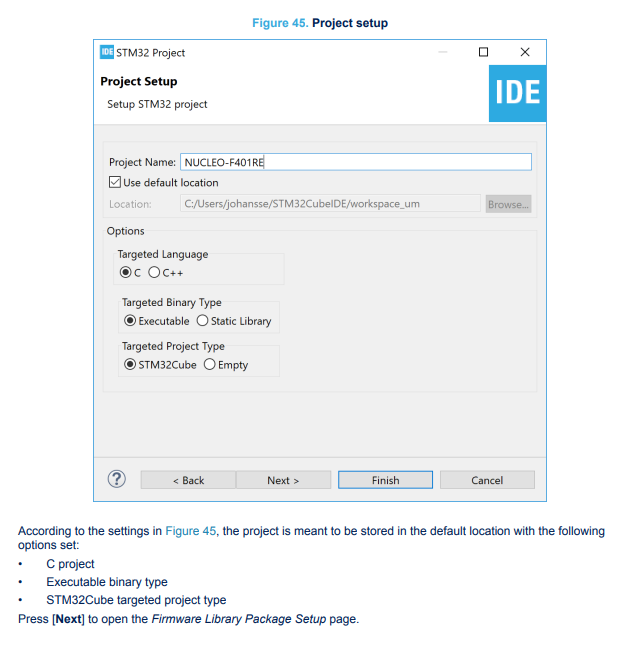
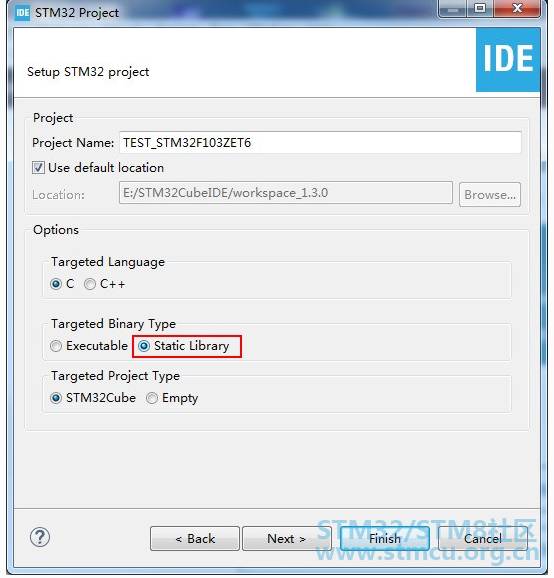
- Project setup: setting up during file creation.
- Setting up in project properties.
Let’s first take a look at the first setup, which allows you to select static library directly when generating a project.
The second type is to modify settings in project properties.
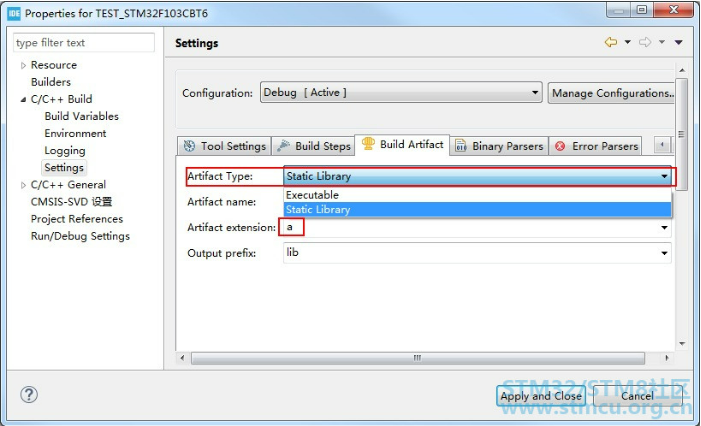
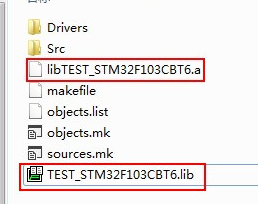
The default generated file is named with “lib” as a prefix and “.a” as an extension. You can change the “a” in the image to “lib” and delete the “lib” at the bottom. This way, the generated file will be in the form of “TEST_STM32F103CBT6.lib
STM32Cube IDE Method for using .lib and .a files.
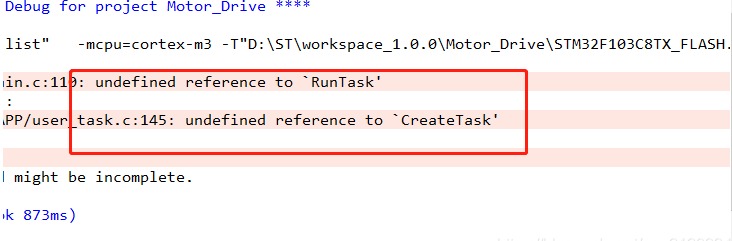
When using STM32Cube IDE, simply including the file path of a pre-written .lib or .a file may not allow it to be used correctly. During compilation, an error such as “undefined reference to `XXXXX'” may occur.
You could follow the tips as below step by step
- The directory where the lib is added should not contain any Chinese characters in the file path.
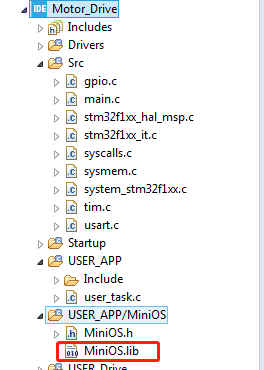
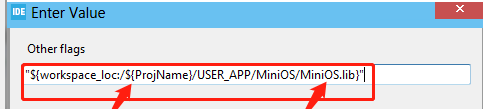
- Set the path
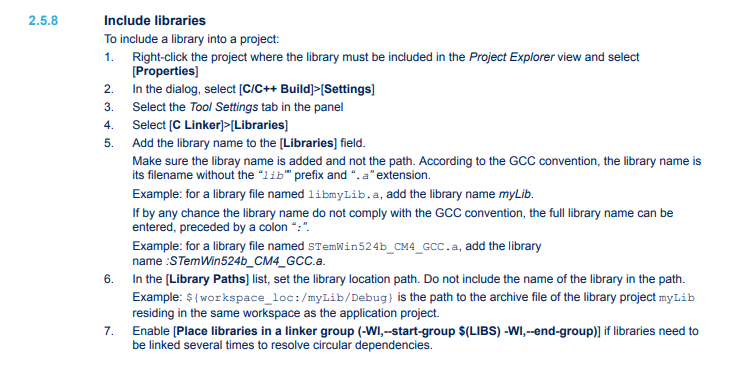
- Using the statues lib add to C Linker;
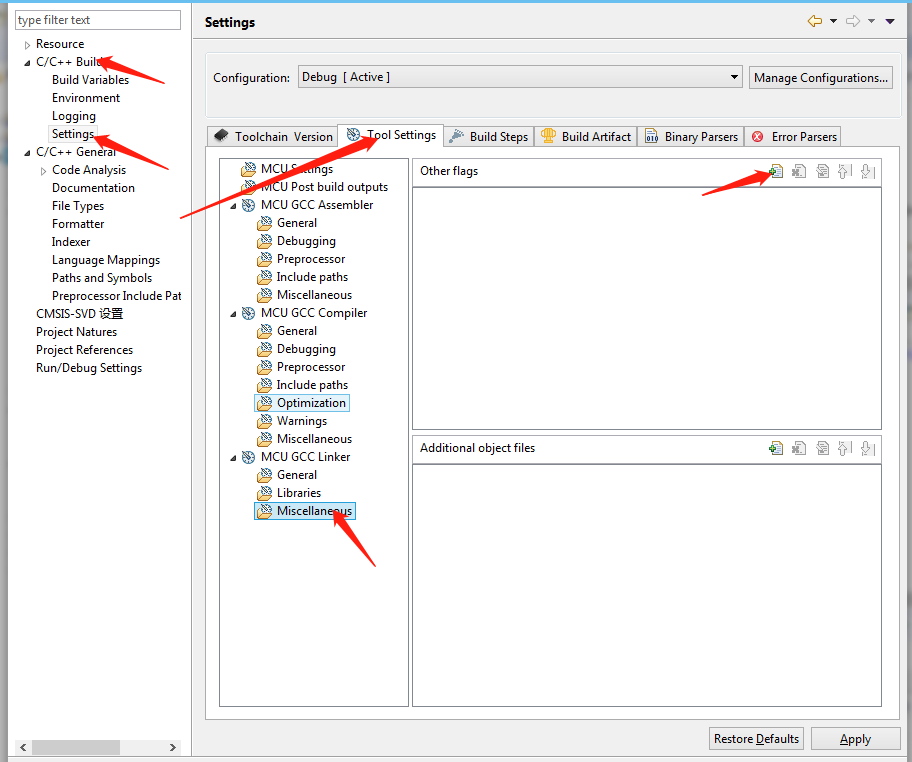
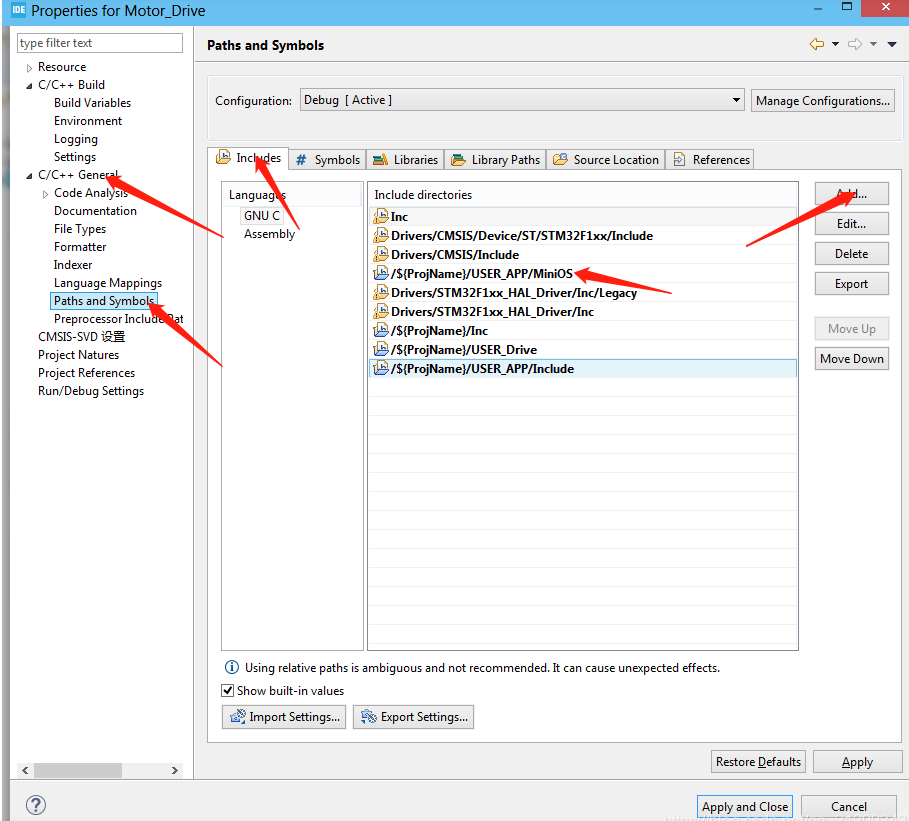
Caution! Do not add the lib path at the location shown in the following image:
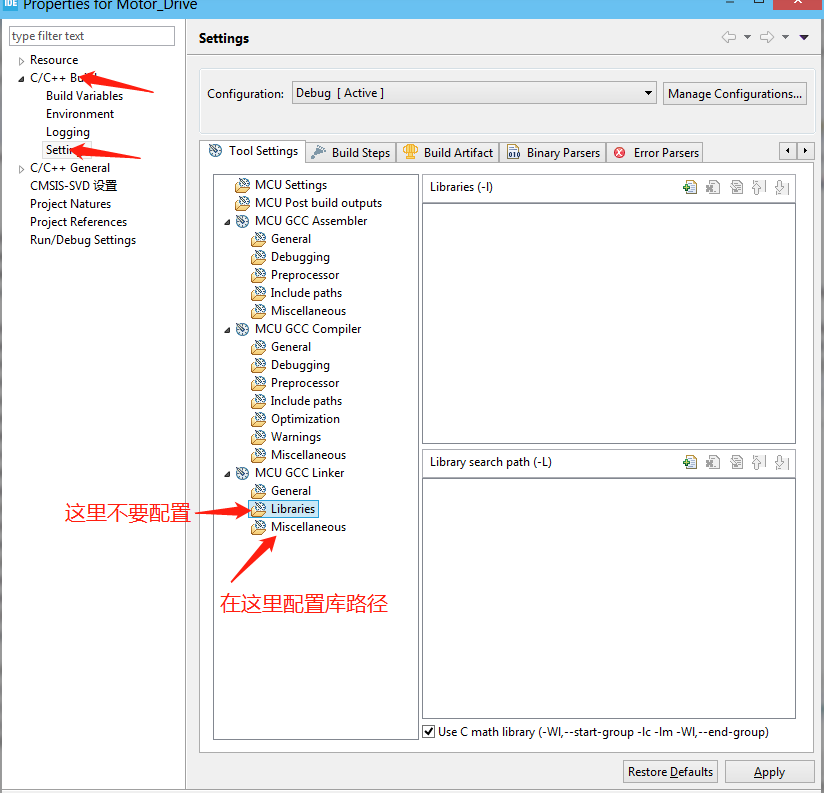
In the official documentation, there are actually instructions on how to reference (P87~P89).