

STM32Cude Tool
Preface
ST has launched various convenient tools for its own MCU products, and different tools can be used for corresponding applications. This chapter will introduce the beginner’s operation of STM32CubeMX.
STM32CubeMX
ST has developed a tool called STM32CubeMX to facilitate the initial setup of code for their MCU. CubeMX is mainly used in the early stages of MCU setup, and other software is needed for compiling the program later on.
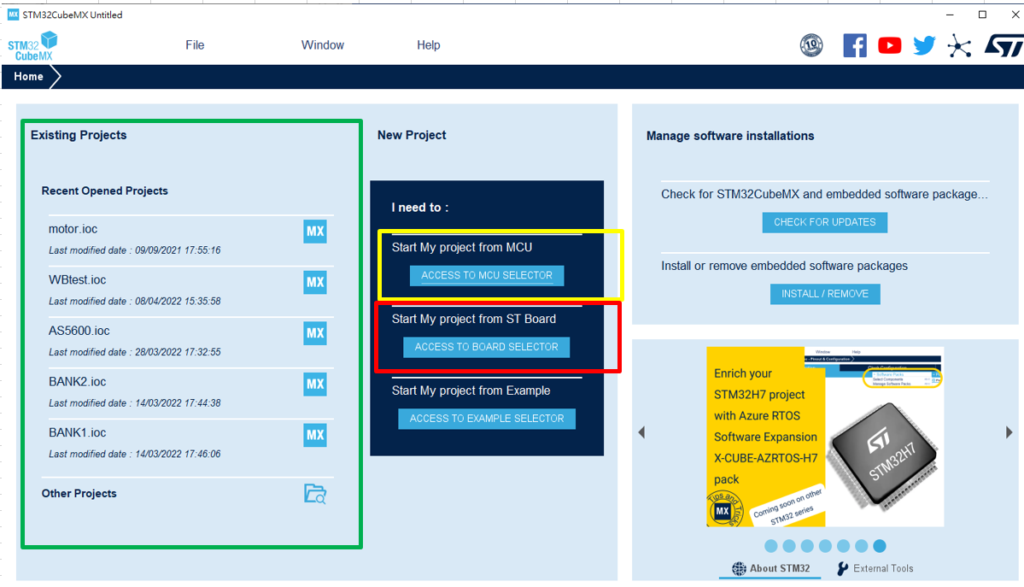
The above image has three boxes, respectively labeled as:
- Green box: Previously built project.
- Yellow box: A clean initial MCU project (suitable for use in custom board design)
- Red box: Projects built based on ST’s official boards (e.g. Nucleo board series)

Here, you can select the desired MCU by using the MCU/MPU Selector, as shown in the above image. The Peripheral filter is a very convenient filter that allows you to select the corresponding MCU option based on the required pins (e.g., selecting ADC3 CAN2).
Pin Setting
Here we take the example of creating a new project for Nucleo-64 (STM32L433) from ST’s official board to continue the explanation.

The above operation is mainly divided into 3 major sections. Below are a few areas to pay attention to and simple setting operations:
- Green box: Mainly used to select and configure various functions (e.g. CAN bus, UART, I2C, etc.)
- Yellow box: Mainly for setting up the configuration process in sequence from left to right.
- Red box: This area is mainly for visualizing the pin configuration based on your settings.
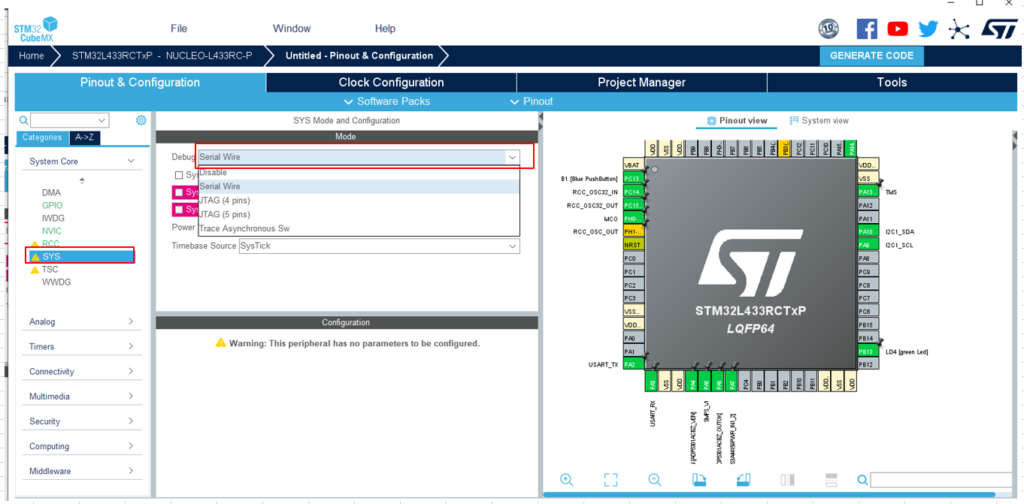
The first thing to pay attention to is in the SYS menu. This is the main setting for the programming method. Select ‘Serial Wire’ here, and the default PIN for programming will appear in the graphical section on the right.(!!Attention!! Do not finish setting up all the pins and then realize that there is no reserved pin for burning, otherwise you will need to redesign the pin configuration again!)
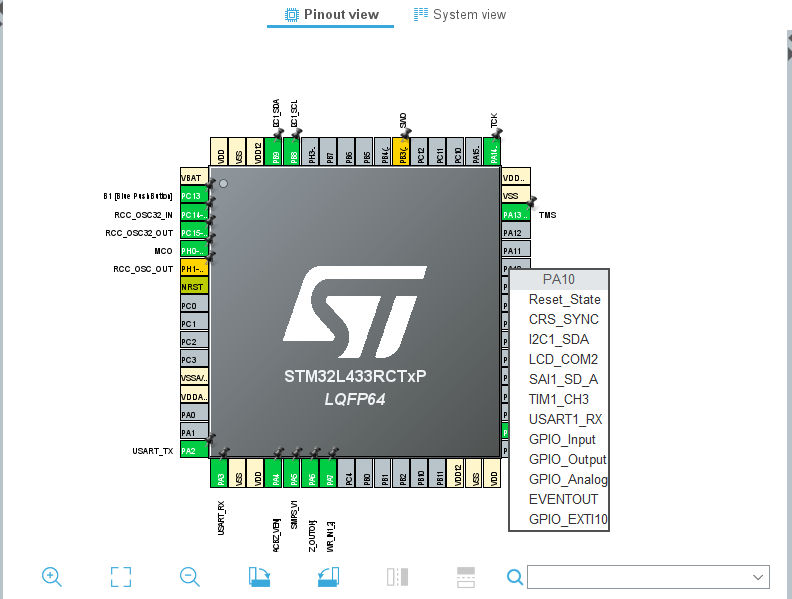
The green pins here are the ones that have been selected for use, while the grayed-out ones have not yet been used. If you move your mouse to the gray area and left-click, the menu shown in the figure above will appear. This can help you understand what each pin can be used for. (We recommend setting the pins first using the method we taught earlier, and then using this method to change the positions of the pins if necessary.)
PS: There is a small trick here where you can hold down the mouse and press ctrl to see the flashing black pins. This means that you can change the position of the pin by dragging it to a new location.
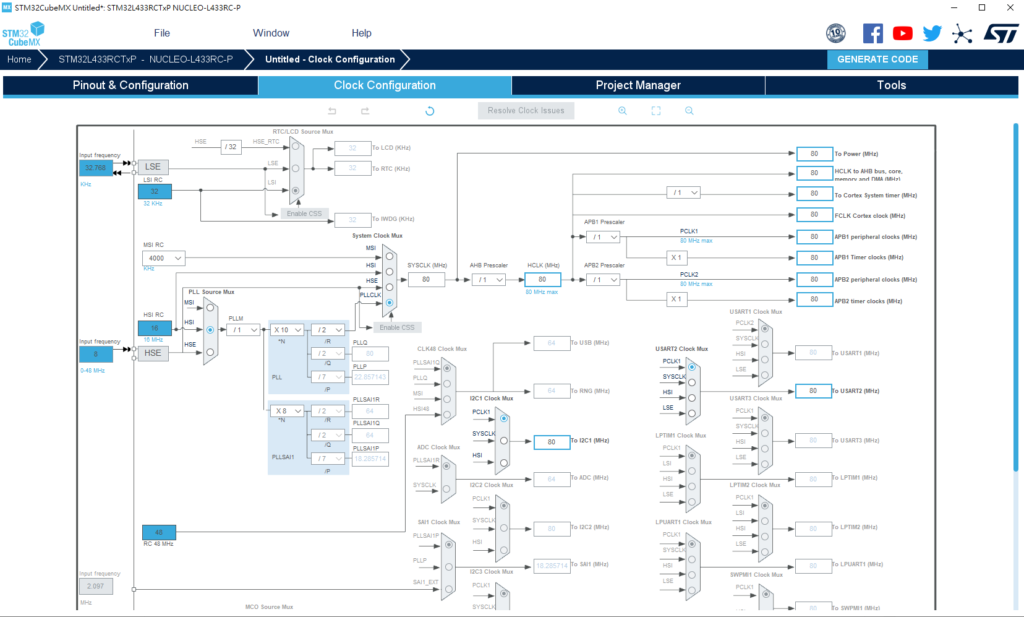
Clock Setting
The area is mainly for setting the status of the clocks used by various circuits, and you can directly enter numbers in the box to complete the settings.
Please note that clock allocation should be based on the datasheet, otherwise the main control item of the MCU will be messed up, causing long debugging time. If there is no special requirement, you can skip this step.
Final Setting
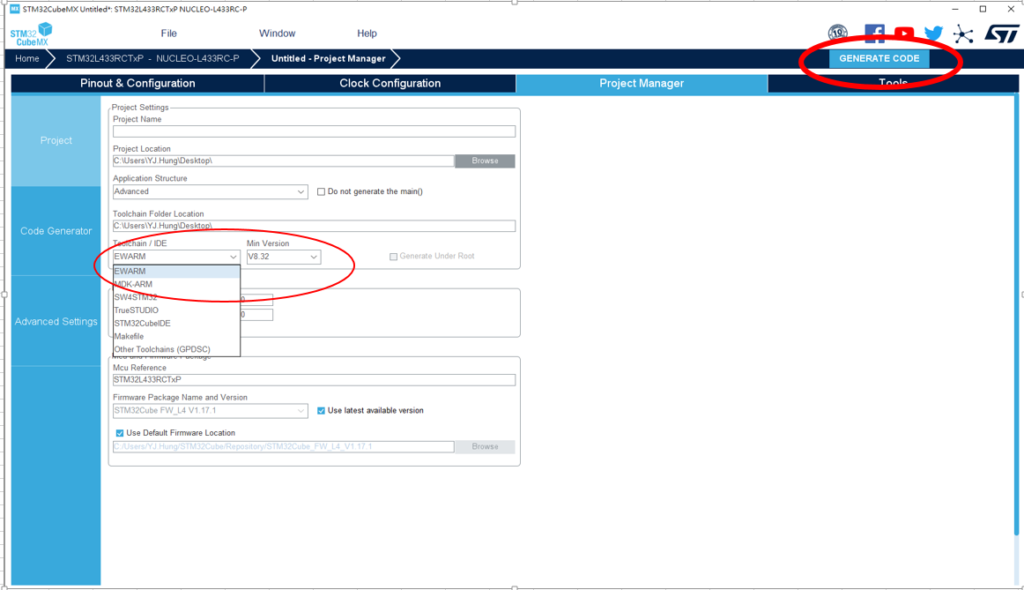
The main purpose here is to set up the drop-down menu in the figure below to choose which editor you will use to write your program. Since we primarily use the ST official STM32CubeIDE, we select STM32CubeIDE here. After setting the project access path and name, the basic setup is complete. Click the GENERATE CODE button in the upper right corner to generate the project program.
Other Setting
The following figure shows the main setting for separating the GENERATE CODE function library into individual files for easy editing (e.g. I2C.h, etc.).
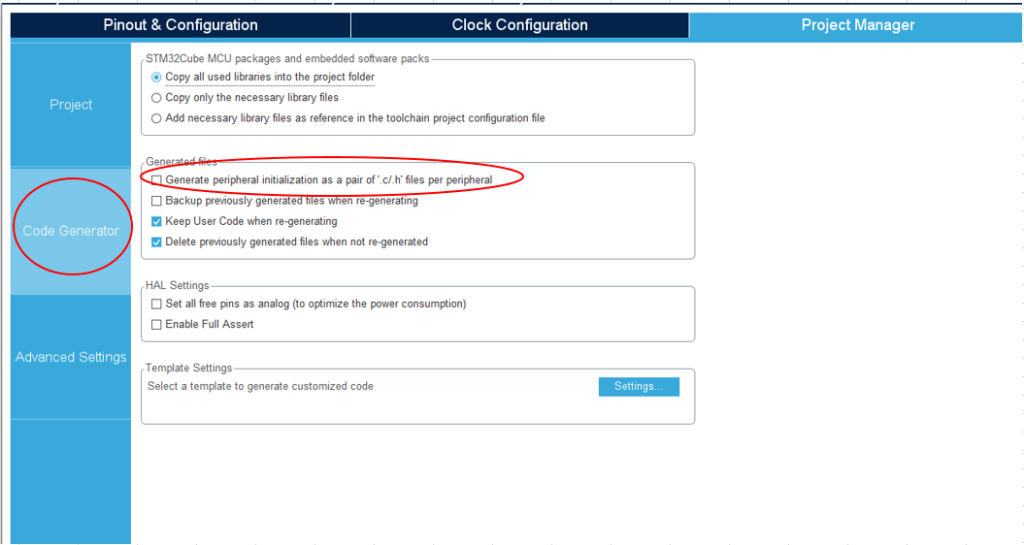
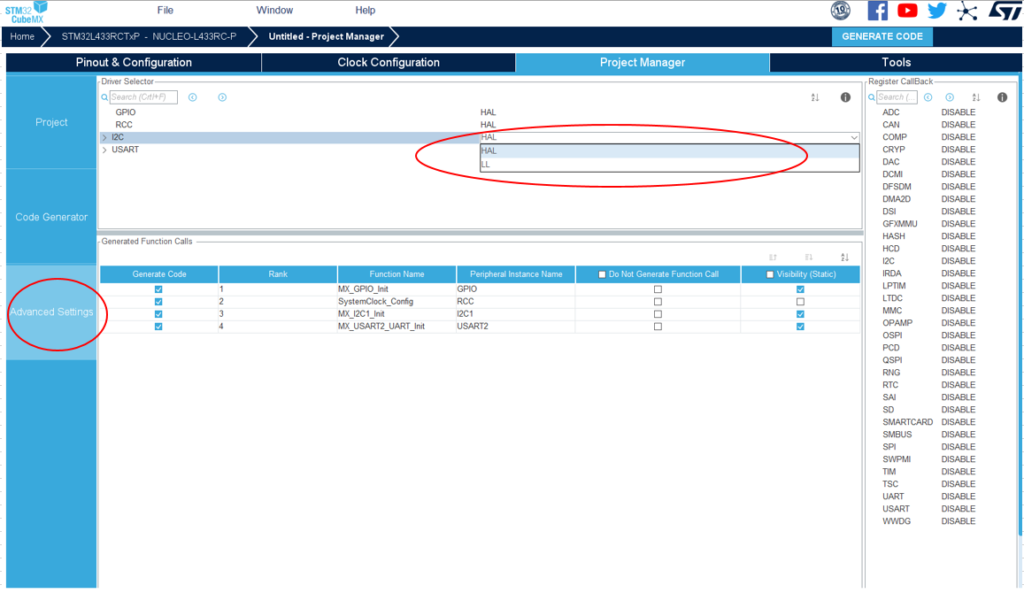
The main purpose of the area in the following figure is to set the level of library functions used. HAL is the application layer provided by ST, and some professionals may prefer to use LL. LL is mainly used for the bottom-level program blocks. After selecting LL, it is recommended to separate the .c/.h files as shown above for convenient editing.
Sum
This chapter mainly introduces CubeMX and is suitable for beginners to read. The next chapter will focus on CubeIDE and CubeProgram.